Core Features
How to add a destination
Save a destination once so it can be reused across trips, with its distance and drive time remembered for next time.
Steps
- Click 📍 Destinations in the sidebar.
- Click + Add Destination (top right of the Destinations page).
- Enter a Destination Name and Full Address (both required). Category is a dropdown (Doctor/Medical, Shopping/Errands, Pharmacy, Grocery, Restaurant/Dining, Hair/Salon, Bank/Finance, Worship/Religious, Senior Center, Recreation/Outing, Other) — pick the closest match rather than typing a category name.
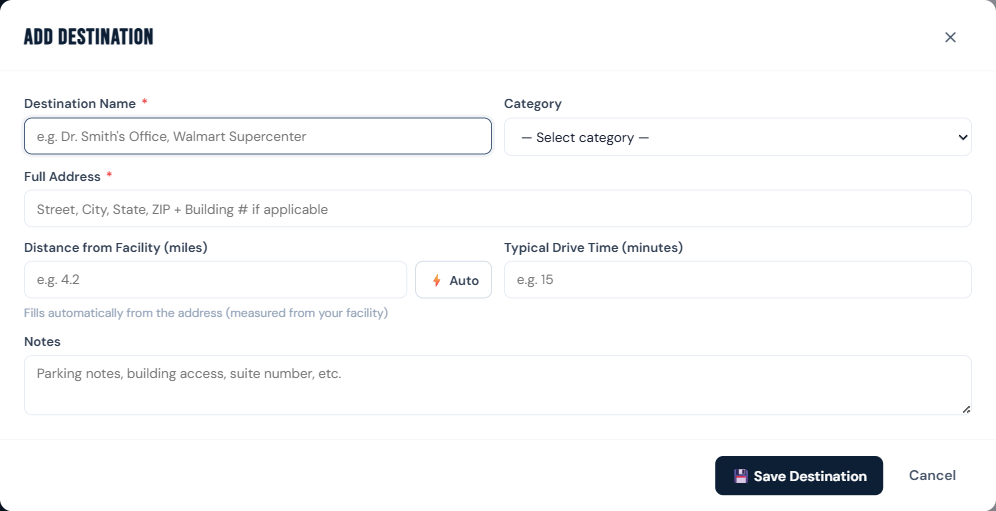
- Distance and drive time are optional here — you can fill them in now, or click ⚡ Auto next to Distance from Facility to measure it from your facility's address (Google routing), or leave them blank and let a scheduled trip fill them in automatically the first time it's used.
- Add any notes and click 💾 Save Destination.
Who can do this
All roles.
Notes
- Destinations can be imported/exported in bulk — see Import destinations from a spreadsheet.
- Deleting a destination only warns (it doesn't block) — existing trips already copied the name and address at the time they were created, so removing the directory entry doesn't change past trips.